
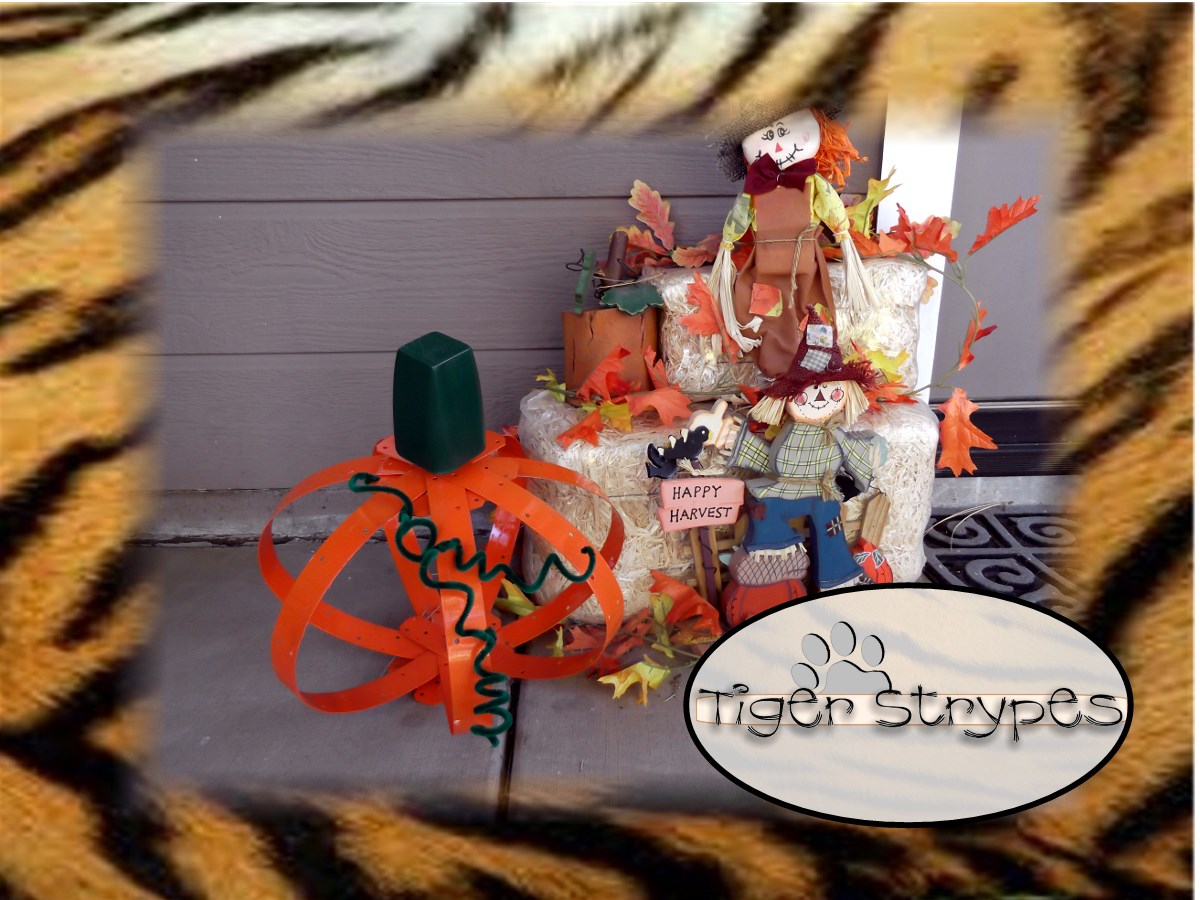
I got my newsletter from good old Lowe’s the other day and saw this in there. Thought it would be a fun one to try. I sure wish painting and waiting for it to dry went quicker, but other than that, it turned out pretty good, I think. This is one that I can use every season and not have to worry if we get an early snow, etc. I always love shopping at Lowe’s and the people that work there are so great. The sweet lady in hardware didn’t know what I was talking about when I asked for the metal straps, but after a brief explanation, she led me right to where they were. So much wonderful staff at our local store.
With Halloween coming up and the kiddos getting ready to go out trick-or-treating, what’s a favorite part of the holiday that you like? I just love the fall season and the “Harvest” celebrations we have and enjoy at church, etc. I just wanted to make something that wasn’t really jack-o-lantern based and more focused on Fall and the things that God creates. I hope you like it!!

“Metal Orb Pumpkin” Craft
- Drill & 1/2″ Bit
- Pliers
- Glue Gun
- (7) 24″ metal straps
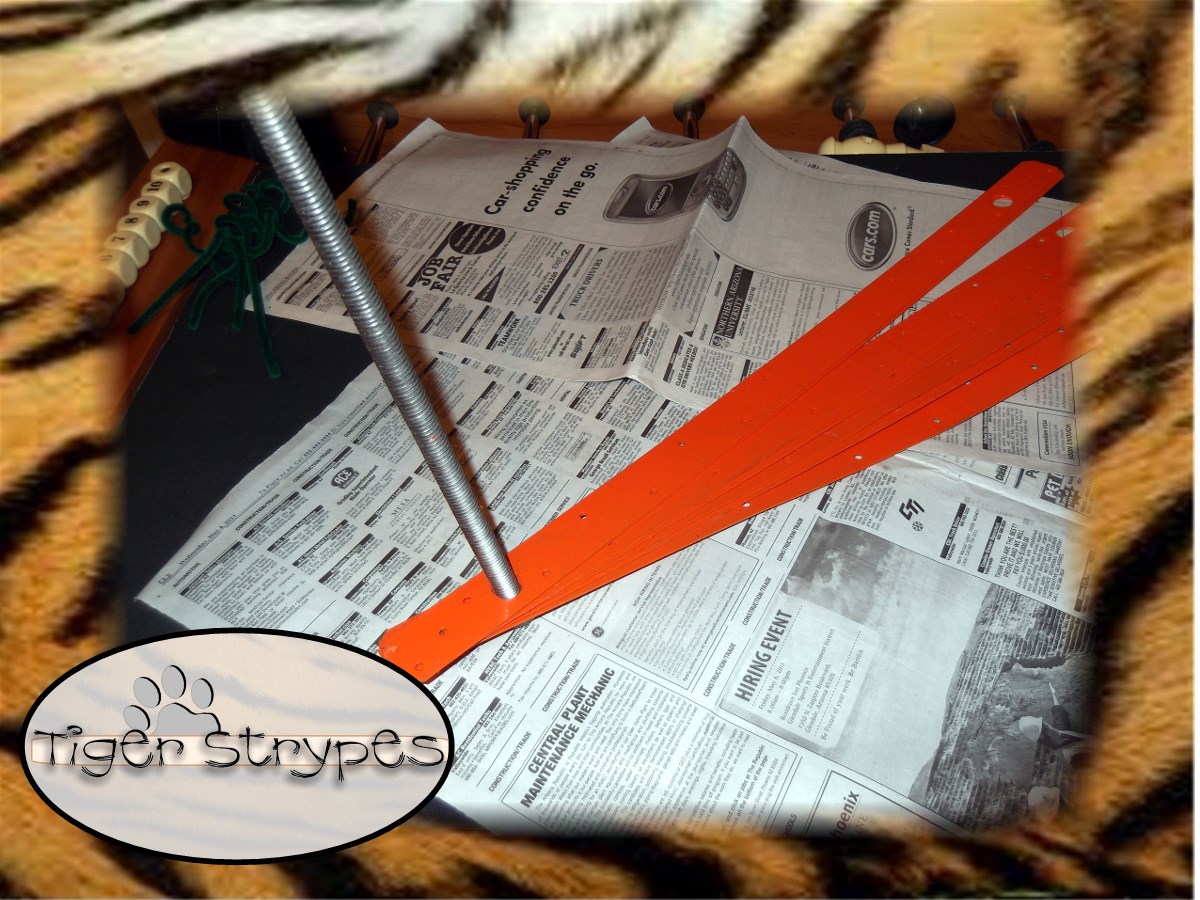
- 1/2″ x 12″ threaded rod
- Square taper bun foot
- (3) 1/2″ hex nuts
- Spray Paint
- & Time
Instructions:
Using a pair of pliers, unscrew the metal hardware from the bottom of the bun foot.

Then use a 1/2″ drill bit to expand (but not deepen) the hole where that was inserted. This will be to attach it to the metal rod at the end.

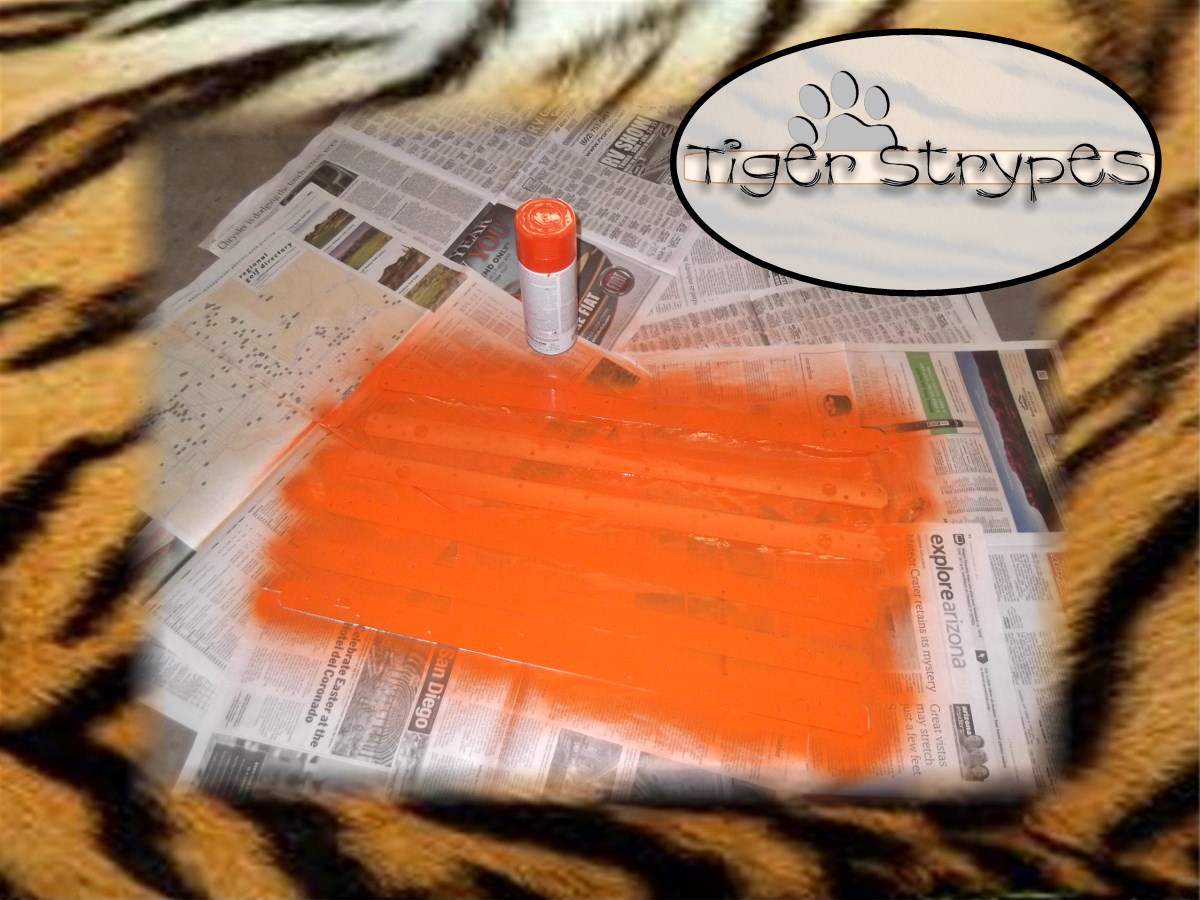
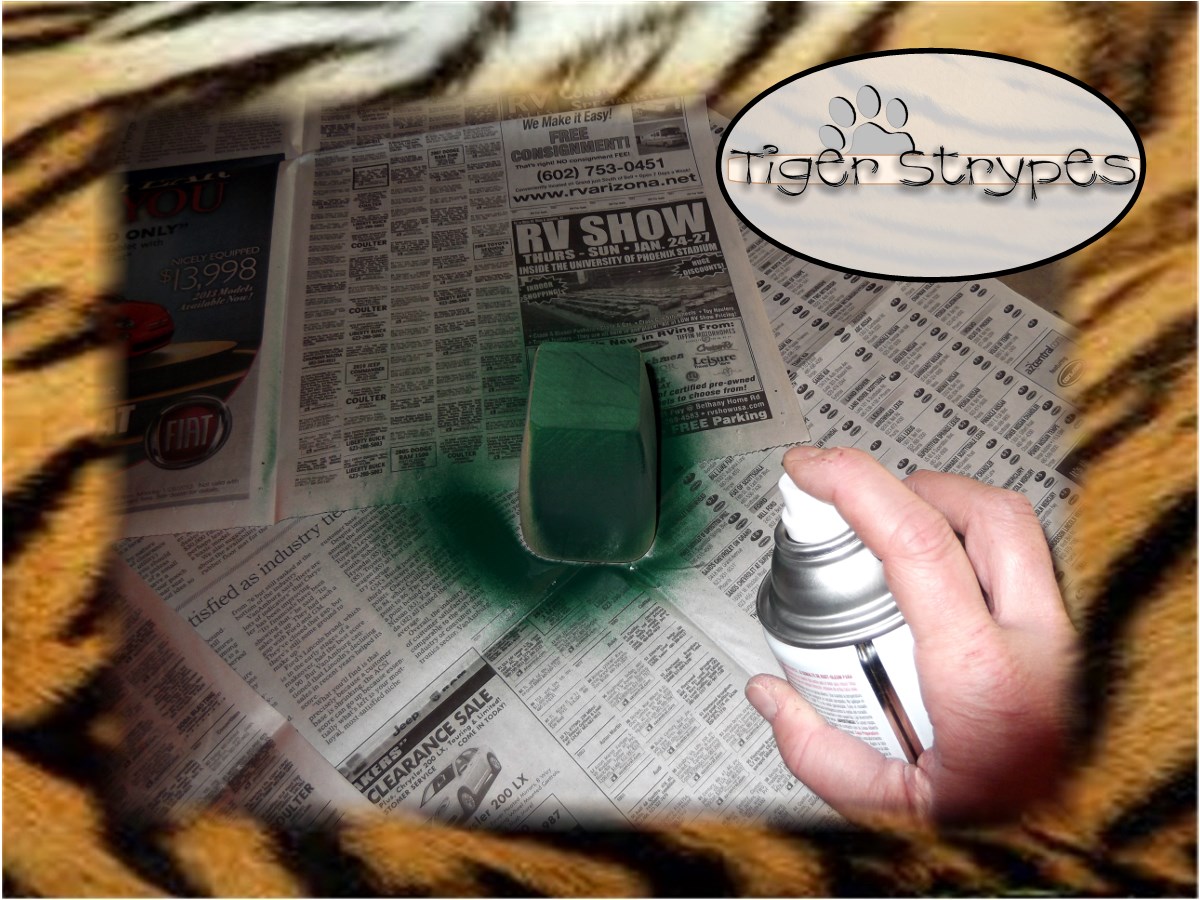
Remove any stickers, etc. from the metal straps, as well as the wooden top, and put them outdoors in a well ventilated area on some old newspaper and begin painting. When the top coat of the straps is dry, flip them over and paint the back side, as well. You can also flip the wooden top and paint the underside of that if you’d like, too. Then just let them sit for awhile until completely dry. If you’d like to, you can also paint the threaded rod and hex nuts – I decided to leave them plain to keep with the “hardware look”. 🙂

When you have all of them on, you can put another nut to the bottom to hold them during the next process. Then just arrange them evenly to be the “body” of the pumpkin shape. Doesn’t matter if it’s perfect, just eyeball it.
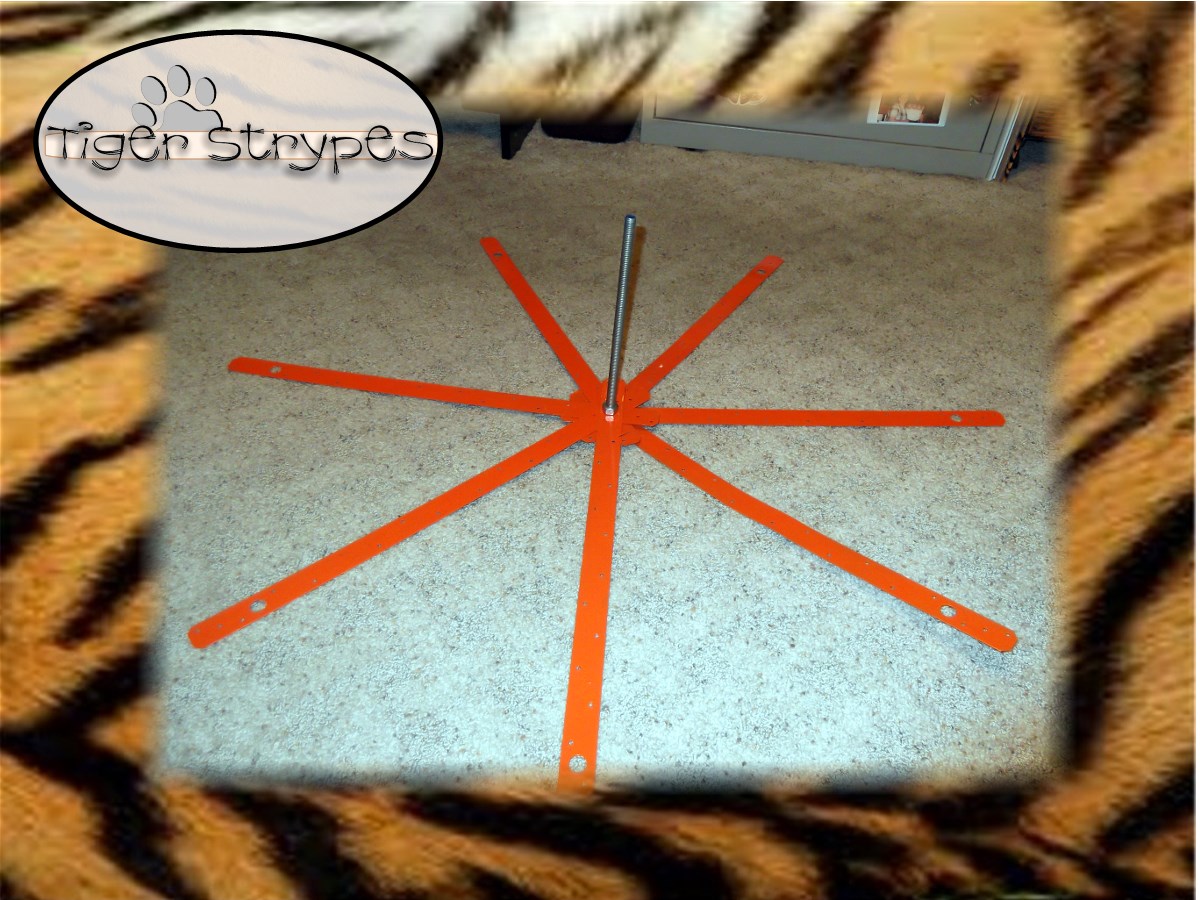
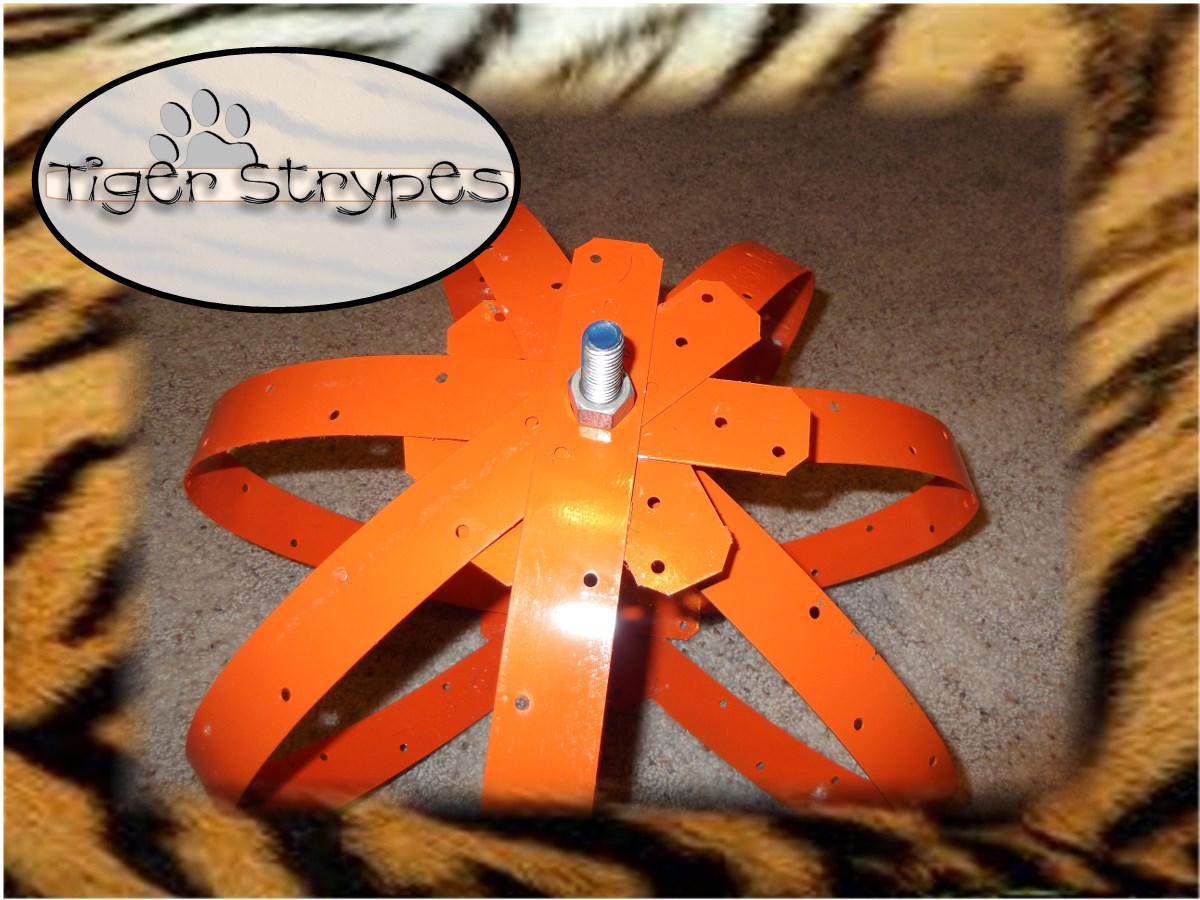
When they are tight, you can then run the nut that was holding the bottom ones down to the top to secure them. I just found that the bottom stayed with no problem, but the top ones kept having spaces that I wanted to tighten up. When that is secure, you can use a glue gun to add some glue to the hole that you drilled, so that it will adhere to the top of the rod and stay secure.


All pictures and text are my own and have not been copied in any way. I, Jamie Tomkins, own and operate Tiger Strypes Blog located at www.TigerStrypes.com. From time to time you’ll hear about my real life experiences or creations with products and/or services from companies and individuals. Let it be known that I have no affiliation with these said companies, and have not received compensation for reviewing or using their service/product. The information that I give regarding the product/service is based off my own personal experience, I do not guarantee that your experience will be the same.
*****************************************************************************************************

*****************************************************************************************************


How cute is that!? What a fun pumpkin project. Thanks for sharing and co-hosting at the #HomeMattersParty – you’re lovely! 🙂
~Lorelai
Life With Lorelai
Thanks Lorelai – it was fun to make!! Thank you for letting me be a part of this great group!
So cool! My boys would enjoy making these! Pinned & Tweeted!
This pumpkin is so creative, post-modernized pieces, LOL! So special!
This is funky and cool. Points for spray paint!
I love that! How creative! I need to get better with my drill.
I tell you the ability to come up with innovative crafts, I don’t know that I’ve gotten there yet, very creative!
You do a great job, Rose!! I have the abilities since I get the emails from Lowe’s Creative Ideas and other great sites. Then I just make it my own! 🙂